.. include:: /../common/authors.txt
Getting Started
1. Install Visual Studio 2017
Download and install Visual Studio 2017 (not Community edition)
2. Install Node JS
Download and install Node JS from https://nodejs.org/ . Choose the latest Current version. (Tested with version 8.5.0)
Or, if you have the need for running different versions of nodejs, for various projects. NVM (Node Version Manager) for windows is recomended, it allows for easy switching between nodejs versions. It can be found at https://github.com/coreybutler/nvm-windows You will need to uninstall nodejs if you already have it, instructions are on the repo.
3. Install Office Developer Tools
Download and install Office Developer Tools from https://www.visualstudio.com/vs/office-tools/
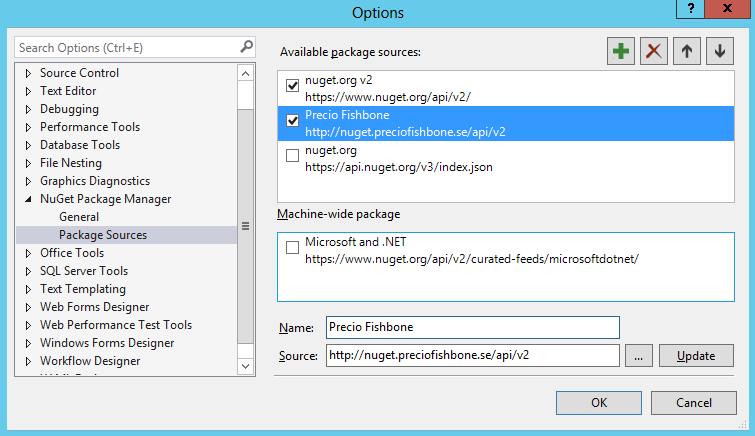
4. Configure Precio Fishbone NuGet package source in Visual Studio
Precio Fishbone NuGet package source is needed for download Omnia NuGet packages. To configure Precio Fishbone NuGet package source, follow these steps:
- In Visual Studio, navigate to Tools > NuGet Packages Manager > Packages Manager Settings
- In the Options dialog, select Package Sources in the left pane
- Add a new package source named Precio Fishbone with this URL http://nuget.preciofishbone.se/api/v2
5. Install Omnia Tooling for Visual Studio
Download and install Omnia Tooling for Visual Studio
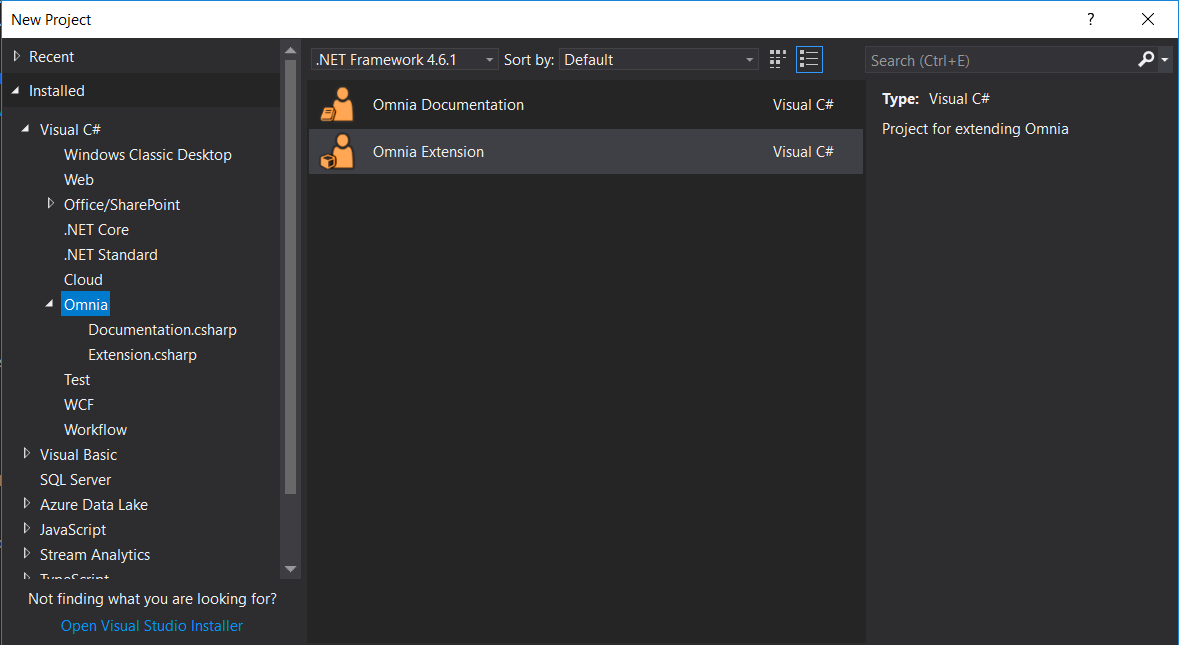
6. Create new project with Omnia Extension project template
Note
- Omnia Documentation - Project template for creating an Omnia documentation package
- Omnia Extension - Project template for creating an Omnia extension package
Select the Omnia Extension template and name your project. Click OK.
The following screen opens
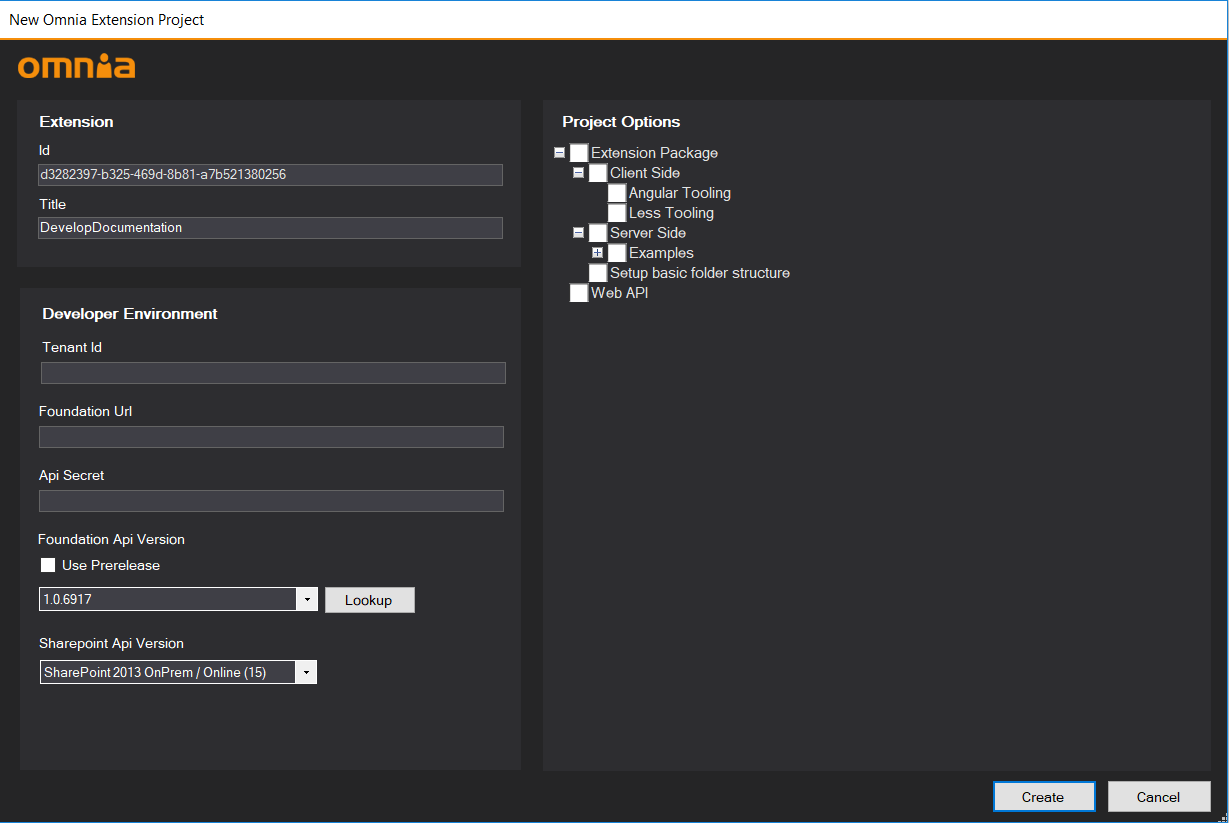
The first section is where you enter metadata about your extension. Normally there is no need to change these two values
The second section exists to help you configure the communication beween your development environment and your Omnia tenant
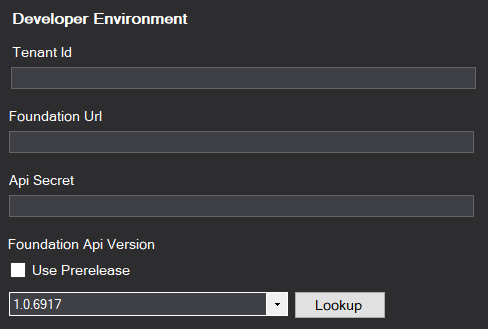
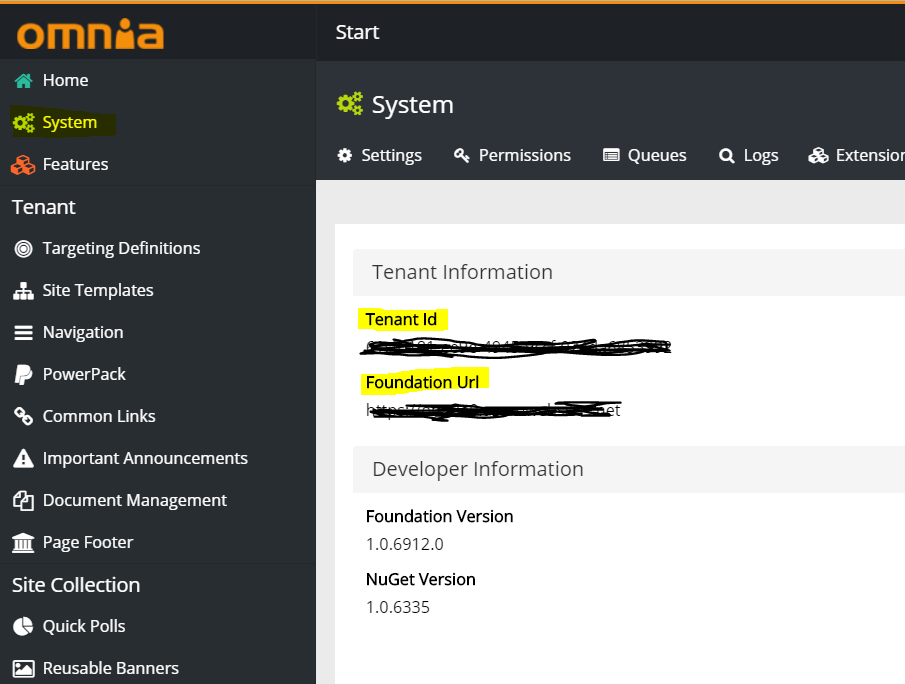
- Tenant Id is found in Omnia Admin in your tenant, in the Settings section (see image below)
- Foundation Url is also found in Omnia Admin, in the Settings section (see image below)
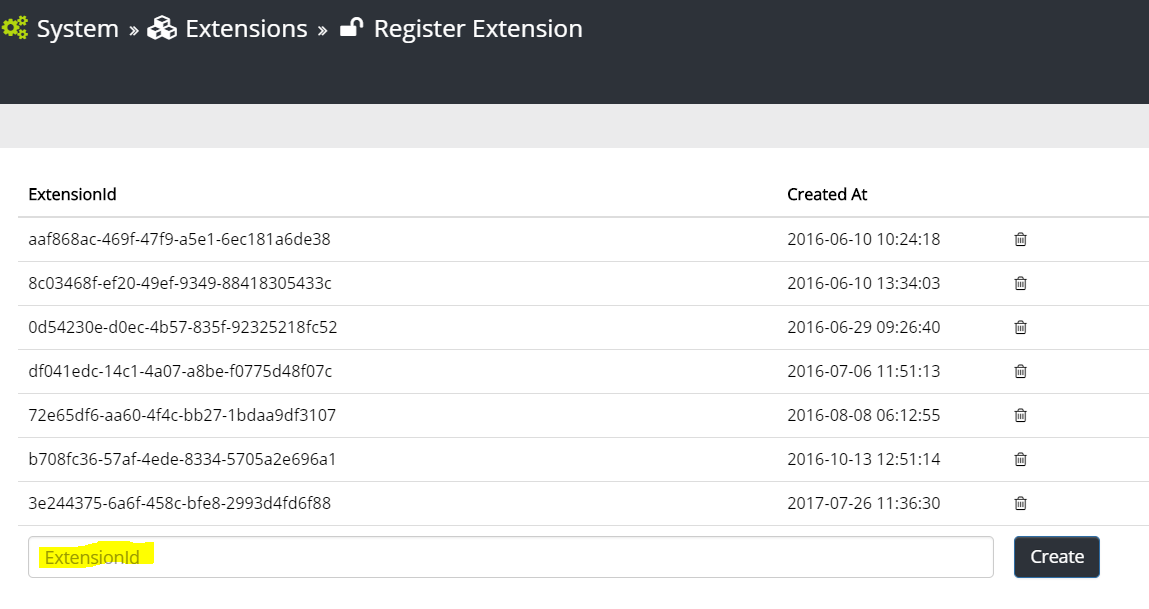
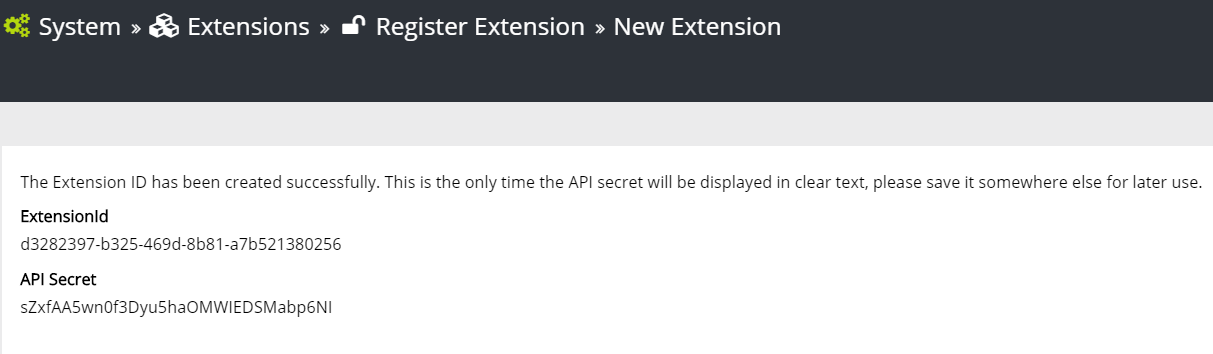
- Api Secret. This secret is recieved from Omnia by navigating to Omnia Admin > System > Extensions > Register Extension and paste in your Extension Id (from the Visual Studio dialog)
The third section’s purpose is there to help you target the correct API version, both in Omnia and SharePoint
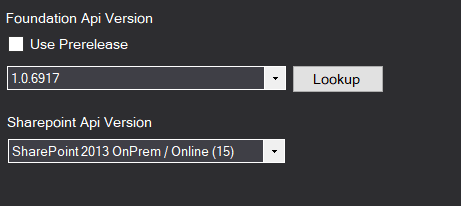
The Foundation API version used in your tenant can be found in Omnia Admin > System, in the Developer Information section
The right hand side of the dialog determines the structure and files that will be created in the Extension projects
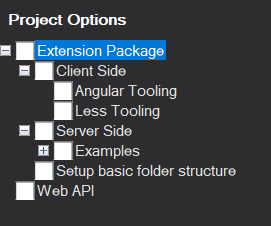
- The Extension Package checkbox controls if an Omnia Extension project is created in the solution
- The Web API checkbox controls if a Web API project, prepared to communicate with Omnia is created in the solution
The Extension Package checkbox has some child items that can be selected
- The Client Side checkbox determines if the project structure and files for doing client side development should be added to the solution
- The Angular Tooling checkbox makes sure the relevant files and tooling support for Angular development is added
- The Less Tooling checkbox makes sure the relevant files and tooling support for compiling Less files is added
- The Server Side checkbox determined if the project structure for doing server side development (like features, jobs etc.) is added to the project
- Below the Examples checkbox you can select different code examples to be provisioned to your project, to set you off to a quick start
- The Setup basic folder structure checkbox will add a best practice folder structure to your project
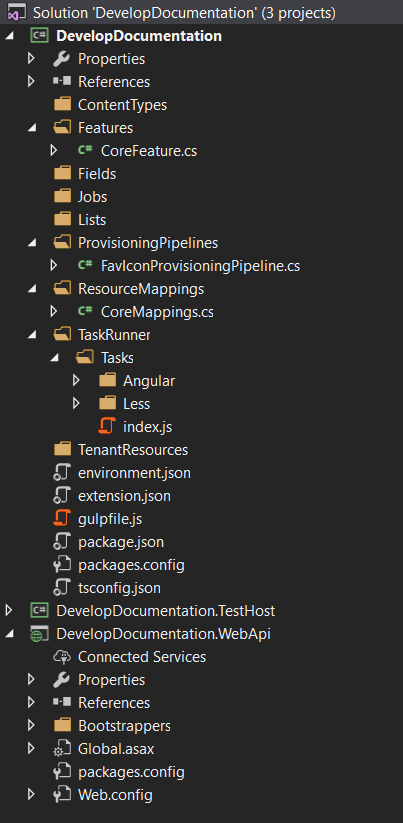
After filling in all the fields in the form, and selecting all the checkboxes, the following solution structure will be created
7. Alter the environment information in your project
(when changing tenant, or when passing the extension over to a fellow developer)
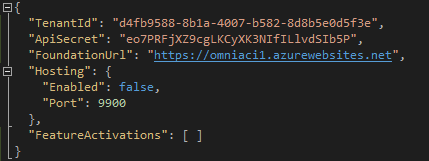
Open the file environment.json in MyOmniaExtension and fill in:
- TenantId: you get this from the System page in Omnia admin
- ApiSecret: the secret you got when you registered your extension in step 6
- FoundationUrl: you get this from the System page in Omnia admin
9. Deploy your extension
Right click on Extension project (DevelopDocumentation) and click Omnia Deploy
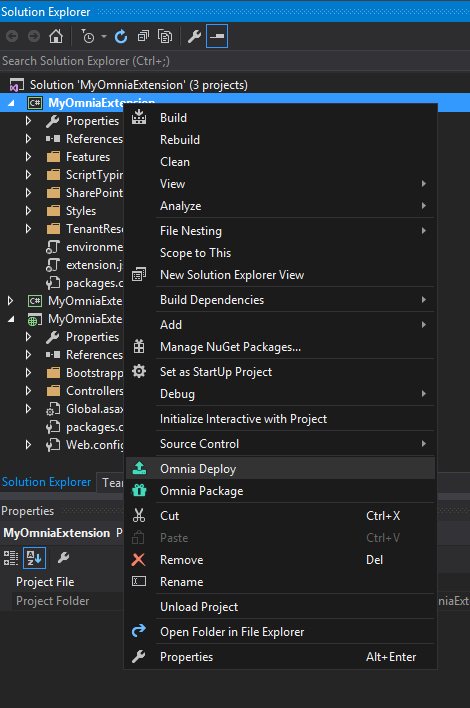
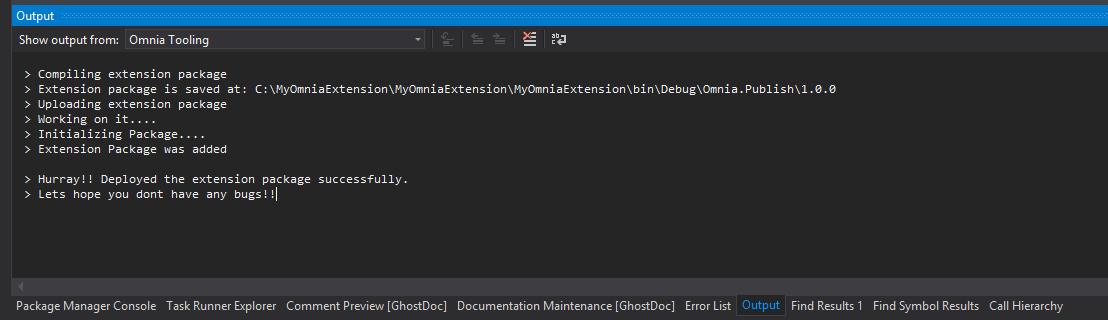
You can see the deployment progress in the Output window in Visual Studio
10. Verify
After the extension has been deployed successfully to Omnia, you can verify it by navigating to System > Extension in Omnia admin

And in the Features page you should see the features from your extension.
Congratulations, you are now ready to build your magical Omnia extension!